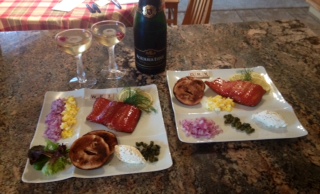
 Wild Alaska Smoked Salmon- the Chef’s 1st Choice to Amazing Healthy Cooking for Boaters! The first step, and probably the most difficult, was sourcing the Salmon. Spending summers in Alaska, and the past 15 years in Seattle I have become spoiled. It was decided that my best bet was a 45 minute trek across Nashville to Costco, my choices were Atlantic farm raised salmon or steelhead. I chose the steelhead because the quality was far superior to that of the salmon. The next step was to make my cures. I knew that if I wanted to create an equal comparison of the two methods I should control my flavor profiles to be as similar as possible, but the creative chef in me just couldn’t do it! For my dry brine I combined brown sugar, white sugar, kosher salt, orange zest, and lemon zest. For my wet brine I combined brown sugar, maple syrup, kosher salt, water, ground cloves, black pepper, and nutmeg.
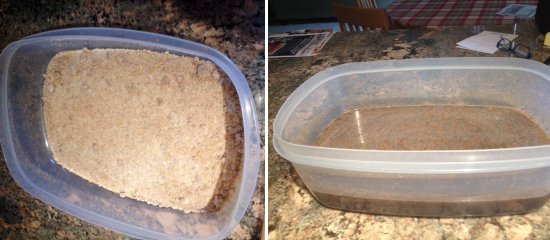 Dry Cure and Wet Brine
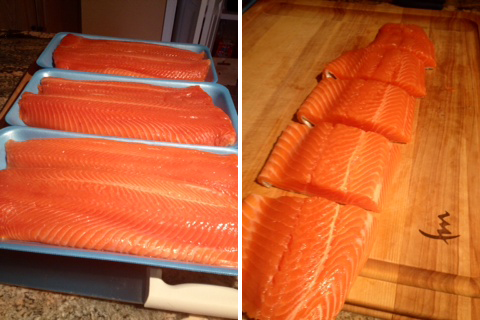
Once I had my cures ready to go it was time to prep the fish. I started with sides of steelhead so the only thing I really needed to do was to remove the pinbones. I chose to leave the skin on to help hold the fish together and protect it from sticking to the smoker racks. Next I cut each side into about 5 pieces. This gave me more exposed surface area for the cures as well as exposure to the smoke. I also knew it would be easier for freezer storage and I was not looking for a whole side to display.
I chose two large, deep plastic containers. When curing fish it is best to choose nonreactive containers to cure the fish in (plastic or glass). Metal pans can react with your cure and create off flavors on the fish. I will start with the wet brine. I mixed all the ingredients together in the plastic container and stirred to dissolve the salt and sugar. Once my brine was well mixed I placed half of the fillets of fish into the brine. I like to lay a paper towel across the top of the fish to keep them well covered by the brine. I placed the lid on the container and placed in the refrigerator overnight. Next it was time to prep the fish in the dry rub. In a mixing bowl I mixed all the ingredients and stirred until well mixed. I placed a layer of the rub all across the bottom of my second plastic container and then placed a layer of fillets, skin side down on top of the rub. I followed with a thick layer of the rub, completely covering the fillets. I then placed a second layer of fillets on top of the first layer, flesh side down (this should create the two fillets of salmon sitting flesh to flesh with a layer of rub in between). I poured the remainder of the rub over the salmon, making sure to push it down in to all the cracks and completely cover the fish. I placed the lid on the container and placed it in the refrigerator overnight.
I let the fish cure for about 18 hours, this seemed to be a good amount for most of the fish, some of the thin tailpieces probably should have been pulled after 8 hours or so. If I was going to smoke large amounts of fish at a time I would place them in separate containers of cure based on their thickness and pull the thinner pieces prior to the thicker pieces. The next step was to rinse the cure off of the fish with cold running water and place on paper towels to dry.
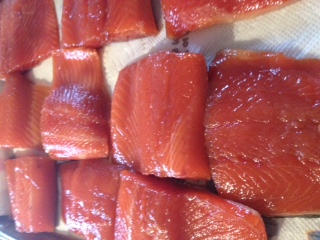
After rinsing and drying the fish it was time to prepare it for smoking. This next step is one of the most important steps in smoking and often gets overlooked. Prior to placing fish in the smoker to smoke, it is essential to allow the fish to sit out in a cool dry place. The cure you used on the fish will protect the fish from spoiling. In this step you are looking to develop a pellicle. Before cured foods are smoked, they should be allowed to air-dry long enough to form a tacky skin, known as a pellicle. The pellicle plays a key role in producing excellent smoked items. It acts as a kind of protective barrier for the food, and also plays an important role in capturing the smoke’s flavor and color. Most foods can be properly dried by placing them on racks or by hanging them on hooks or sticks. It is important that air be able to flow around all sides. They should be air-dried uncovered. To encourage pellicle formation, you can place the foods so that a fan blows air over them. The exterior of the item must be sufficiently dry if the smoke is to adhere. I placed my fish on the smoker racks (I first sprayed them with non-stick spray) and set them outside on the back deck. It was probably about 55 degrees with a light breeze so I did not bother to set up a fan on them. I left them outside for about 2.5 hours.
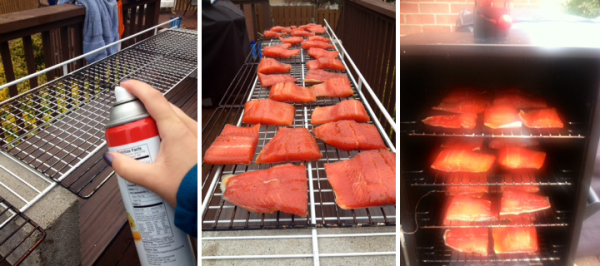
It was finally time for the smoking process. We chose to use hickory wood chips to smoke the fish, mostly because it was what we had. Apple wood, other fruit woods, or alder also make good options. Our wood chips were well soaked and our water pan was full. We fired up the smoker and allowed our wood chips to get good and smoky. We then opened the door to put the fish inside the smoker and also allow the temperature to drop a bit. Our goal was to smoke the fish at a lower temperature, in order to gently cook the fish. Other than not developing a pellicle prior to smoking, the second biggest problem is cooking the fish too hot too fast. This causes the muscle fibers in the meat contract so violently that they extrude albumin, a creamy white protein, which immediately congeals on the surface of the fish. This Protein is not harmful however it is a sign that your fish will be drier than it needed to be. Depending on your smoker it can be difficult to maintain your level of smoke and a low cooking temperature. Our goal was to smoke the fish for 2 hours at 100 degrees, then increase the heat to 140 for 2 hours, and finally increase the heat to 170 for a final 2 hours aiming for an internal temperature of 140-145. We had a hard time keeping our smoke up and our temperature low so we ended up smoking the fish for about 6 hours at 140-145 degrees. We opened the door to drop the temperature a few times throughout the process. This cooked the fish a little hotter than I would have preferred, however the end product was still far superior to most packaged smoked salmon you can find in the store. Once we removed the fish from the smoker we allowed it to rest at room temperature until it was cool.
 |
 |
|
Wet Brine •3 cups Brown Sugar
|
Dry Cure •3 Cups White Sugar |
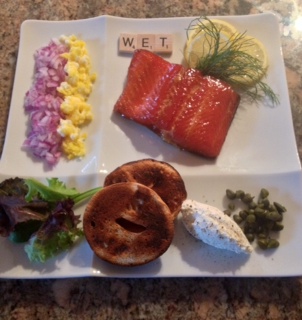
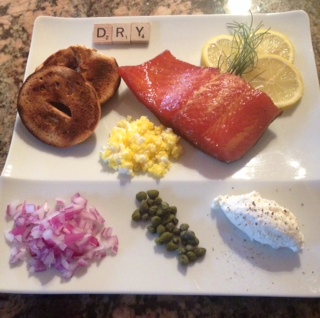
Now the big debate: Wet brine vs Dry cure? After extensive taste testing we all unanimously agreed that both produced a spectacular product. We were unable to distinguish a difference in the texture or moisture content of the fish. The wet smoked was a bit sweeter, but we credit that to the maple syrup in the brine. Prior to smoking the dry cured salmon was drier. It appeared that more moisture was pulled out by the dry rub than the wet brine. While developing the pellicle it appeared the wet brine had a stickier surface than the dry cure (possibly due to the maple syrup). After all was said and done my professional opinion is that one method is not superior. I will use both techniques again (if I can convince Trig to buy me a smoker!) I would base my decision on the flavor profile I wanted to achieve.
About Chef Alisa:

Viaggio Charter is excited to introduce Chef Alisa Jestel, the newest member of the Viaggio team! Chef Tristin was offered an exciting land based opportunity in Seattle that was too good to pass up. With Tristin moving ashore, Captain Trig found himself in need of a new chef so he turned to his long time friend and prior co-worker Alisa.
Alisa has been cooking professionally around the Seattle area for the past fifteen years, the last six of which have been spent aboard a variety of luxury yachts cruising the Pacific Northwest! Alisa thrives on the abundance of local products available in the area and enjoys creating memorable dining experiences at every opportunity! She customizes each and every meal to the individual needs of VIAGGIO’s guests, and loves taking time to share her passion and knowledge for food with anyone that is interested. Alisa has been known for giving impromptu cooking classes on cooking what you catch, fresh pasta making, and seasonal cooking.

Alisa spends her free time during the off season traveling and exploring her love for food in other countries. She finds her self often revisiting Italy for more extensive training on pasta making and other old world culinary arts! Viaggio Charters is excited to welcome Alisa aboard and looks forward to sharing her culinary delights with you!
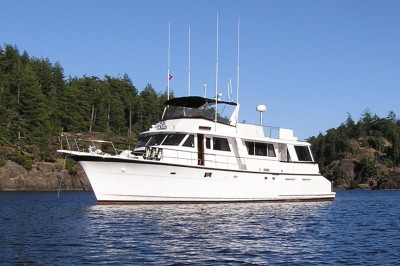 Viaggio Yacht Charter – SE Alaska
Seasoned Crew – Custom Designed Itinerary – Relaxation – Majestic Alaska Beauty


